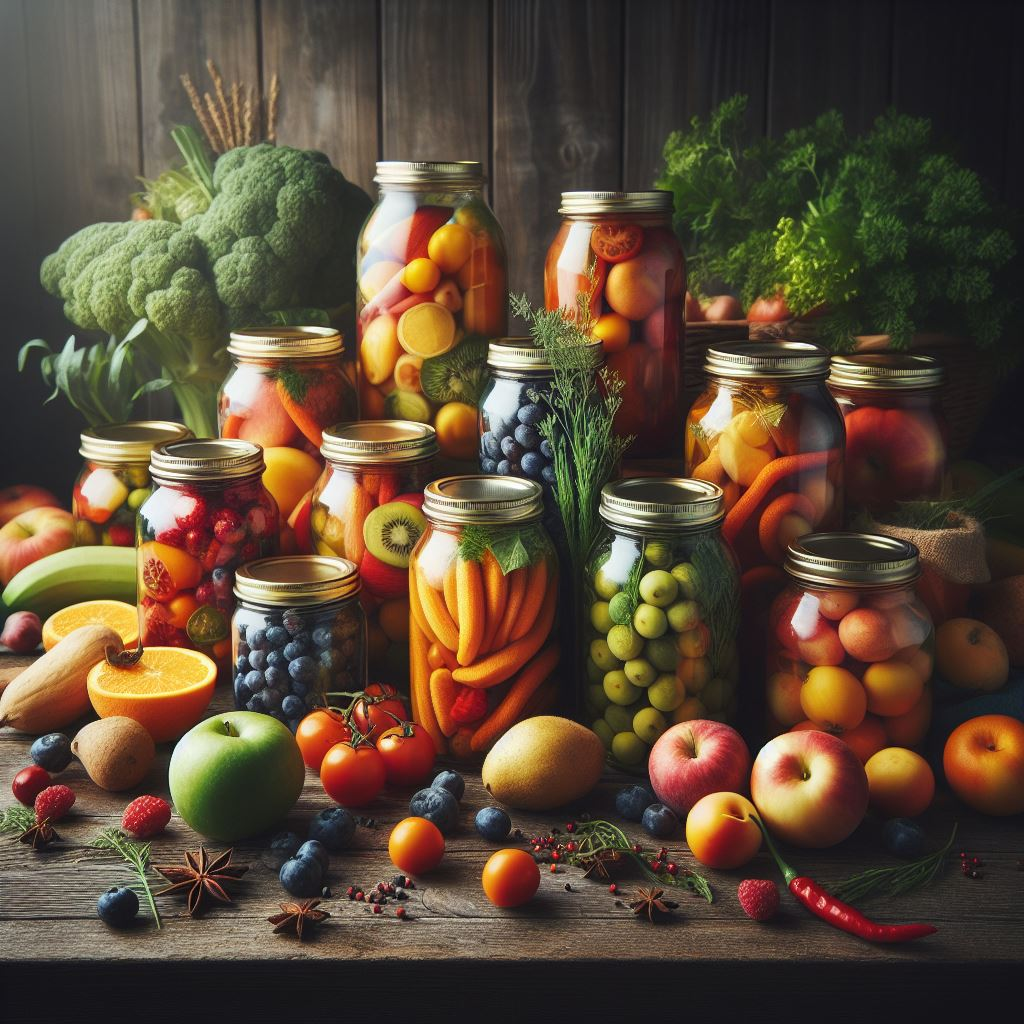
Canning Fruits and Vegetables: Preserving the Bounty of Your Harvest
Canning is a time-tested method of preserving food that allows you to enjoy the taste of summer’s bounty throughout the year. Whether you have a fruitful garden overflowing with fresh produce or are taking advantage of seasonal sales at the grocery store, canning empowers you to capture peak flavor and nutrition. But how exactly does this process work, and why is it such an effective way to store food?
The Science Behind Canning: Inactivating Spoilage and Creating a Vacuum Seal
Canning works by creating an environment inhospitable to the microorganisms that cause spoilage. These microorganisms, primarily bacteria and molds, thrive in warm, moist conditions and can lead to foodborne illness or simply render your food unappetizing.
The canning process tackles these threats in two key ways:
-
Heat Treatment: Fruits and vegetables are subjected to high temperatures during the canning process. This heat destroys or inactivates enzymes naturally present in the food that would otherwise continue the ripening process, leading to spoilage. More importantly, it kills any harmful bacteria or molds that might be present. The specific heating time and temperature required depend on the acidity of the food being canned. Foods with lower acid requires a longer processing time at a higher temperature to ensure safety.
-
Vacuum Seal: Once the food is heated, the jars are sealed with airtight lids. As the jars cool, the contents contract, creating a vacuum seal. This lack of oxygen further inhibits the growth of bacteria and molds, which typically require oxygen to thrive. The sealed jars prevent new microorganisms from entering and contaminating the food.
The combination of heat treatment and vacuum sealing creates a shelf-stable product that can be safely stored for extended periods.
Advantages of Canning: Beyond Seasonal Delights
Canning offers a multitude of benefits that go beyond simply having fresh-tasting produce year-round. Here are some key advantages to consider:
- Food Security and Self-Reliance: Canning allows you to preserve the harvest at its peak, ensuring a steady supply of fruits and vegetables throughout the year. This is particularly great if you harvest your own garden or by in bulk at certain times.
- Cost-Effective: By canning your own produce, you can save money compared to buying commercially canned goods, especially during off-seasons when prices tend to be higher.
- Nutritional Value: Home-canned foods retain a high percentage of their vitamins, minerals, and flavor compared to commercially processed options that often involve additional processing and additives.
- Control Over Ingredients: When you can at home, you control the ingredients that go into your food. You can avoid unnecessary sugars, preservatives, or artificial flavors often present in commercially canned goods.
- Variety and Creativity: Canning opens a world of possibilities for preserving a wide variety of fruits, vegetables, jams, jellies, pickles, and even meats. You can experiment with different recipes and flavors to create a personalized pantry of delicious and nutritious food.
Canning Basics: Getting Equipped and Ready to Preserve
Before diving into the canning process, ensure you have the necessary equipment and understand some essential safety guidelines.
Essential Equipment:
- Canning Pot: A large pot with a tight-fitting lid, deep enough to completely submerge the filled jars with at least an inch of water above them.
- Canning Jars: Heat-resistant glass jars specifically designed for canning. These typically come in various sizes, suitable for different fruits and vegetables.
- Lids and Bands: New, unused lids and screw bands are crucial for each canning session. Lids form a seal with the jar rim, while bands hold the lids in place during processing.
- Jar Lifter: A long-handled utensil specifically designed to safely remove hot jars from the canning pot.
- Headspace Tool: A measuring tool to ensure proper headspace (the space between the food and the rim of the jar) in your jars.
Safety First:
- Use Tested Recipes: Follow reliable, tested canning recipes from reputable sources, such as the National Center for Home Food Preservation (https://nchfp.uga.edu/). These recipes have been tested for safety and effectiveness with specific processing times and temperatures for different foods. After getting to know your way around canning then get creative.
- Proper Acidity: Acidity plays a crucial role in preventing the growth of harmful bacteria in canned foods. Low-acid foods (pH above 4.6) require a pressure canner for safe processing. High-acid foods (pH below 4.6) like fruits, pickles, and some tomatoes can be safely processed in a boiling water canner.
- Inspect Jars and Lids: Before each use, carefully examine jars for cracks, chips, or imperfections. Discard any damaged jars or lids.
Canning Step-by-Step: A Safe and Rewarding Journey
Now that you understand the science behind canning and its advantages, let’s delve into the step-by-step process. Here’s a breakdown of the essential procedures involved in water bath canning, the most common method for high-acid foods:
1. Preparation:
- Gather Your Ingredients: Select fresh, high-quality fruits or vegetables for canning. Wash them thoroughly to remove any dirt or debris.
- Prepare the Canning Pot: Wash the canning pot and lid with hot soapy water. Fill the pot with enough water to cover the filled jars by at least 1 inch. Bring the water to a simmer (180°F) on medium heat. This preheats the jars for filling and prevents them from cracking when filled with hot food.
2. Sterilize Jars and Lids:
- Wash Jars and Lids: Wash the jars and lids in hot soapy water. Rinse them well and let them drain on a clean dish towel.
- Sterilization Method 1: Boiling Water Bath: Place the jars upright on a rack in a large pot filled with simmering water (180°F). Ensure the jars are completely submerged. Simmer for at least 10 minutes. Keep the jars hot in the simmering water until you’re ready to fill them.
- Sterilization Method 2: Dishwasher (Optional): Some dishwasher models have a “sanitize” cycle that can be used to sterilize jars. However, this method is not recommended by all resources and may not be as effective as the boiling water bath method. Check your dishwasher’s manual and consult a trusted canning resource for specific instructions if you choose this method.
3. Prepare the Food:
- Follow a Tested Recipe: Choose a tested canning recipe appropriate for the specific fruit or vegetable you’re canning. The recipe will provide instructions on preparing the food, including washing, peeling, slicing, or chopping as required.
- Prepare According to Recipe: Follow the recipe’s instructions for preparing the food. This might involve blanching ( briefly boiling) some vegetables to deactivate enzymes and soften them for packing.
4. Filling the Jars:
- Use a Jar Lifter: Carefully remove a hot jar from the simmering water using a jar lifter. Place it on a clean kitchen towel.
- Fill the Jar: Pack the prepared food into the hot jar according to the recipe’s instructions. Leave the recommended headspace (typically ¼ to ½ inch) between the food and the rim of the jar. Headspace allows for expansion during processing and helps create a good seal.
- Remove Air Bubbles: Use a non-metallic utensil like a sanitized plastic spatula to gently remove any air bubbles trapped between the food pieces.
5. Adding Liquid (Optional):
- Syrup, Juice, or Water: Depending on the recipe, you might need to add boiling syrup, fruit juice, or plain boiling water to the jar to cover the food completely. Leaving some headspace is still important.
6. Wiping the Rim and Sealing:
- Clean the Rim: Wipe the rim of the jar with a clean, damp cloth to remove any food particles or residue. A clean rim is essential for a proper seal.
- Place Lid and Band: Place a new, unused lid on the jar. Center the lid on the rim. Screw on the band finger-tight (not overly tight).
7. Processing the Jars:
- Transfer Jars to Canner: Using the jar lifter, carefully transfer the filled jars to the simmering water bath canner. Ensure the jars are upright and do not touch each other.
- Adjust Water Level: Add more hot water to the canner, if necessary, to ensure the jars are covered by at least 1 inch of water.
- Bring Water to a Boil: Bring the water in the canner to a rolling boil.
- Start Processing Time: Once the water reaches a rolling boil, begin the processing time specified in your recipe. Processing times vary depending on the food, jar size, and altitude.
- Maintain Boil Throughout: Adjust the heat to maintain a rolling boil throughout the processing time. Don’t let the water simmer.
8. Cooling the Jars:
- Turn Off Heat and Remove Jars: After the processing time is complete, turn off the heat and carefully remove the canner lid. Let the jars sit undisturbed in the hot water for 5 minutes (optional). This step helps prevent siphoning, which can occur when the hot liquid in the jar cools too quickly.
- Remove Jars from Canner: Using the jar lifter, carefully remove the jars from the canner, keeping them upright to avoid disturbing the seal. Place them on a clean, heat-proof surface covered with several layers of kitchen towels to protect surfaces.
- Cool Completely: Allow the jars to cool undisturbed for at least 12 hours at room temperature and away from drafts. Do not retighten bands during this time as it can interfere with the sealing process. You’ll likely hear a satisfying “ping” sound from the lids seal, indicating the vacuum has formed.
9. Testing the Seal and Storing:
- Check for Seals: Once fully cooled, press the center of each lid. It should be concave and not flex or pop upward. If a jar did not seal properly, the lid will remain flat or be easily moved.
- Label and Date: Label each jar with its contents and the date of canning. This will help you track your inventory and use the oldest jars first.
- Storage: Store sealed jars in a cool, dark, and dry place. Avoid extreme temperatures and direct sunlight. Properly canned foods can safely last for a year or longer, however, for the best quality and nutritional value, use within a year.
Important Considerations:
- Adjusting for Altitude: If you live at a high altitude, you need to adjust the processing time for water bath canning. Water boils at a lower temperature at higher elevations, therefore extending the processing time is necessary to ensure the food reaches a safe internal temperature. Consult a reliable canning resource for altitude adjustments.
- Pressure Canning for Low-Acid Foods: For low-acid foods, such as vegetables, meats, and some soups, use a pressure canner. You can get a pretty nice one for 80 dollars or less. A pressure canner raises the boiling point of water higher, reaching temperatures necessary to safely process low-acid foods and prevent the growth of harmful bacteria that can cause botulism.
Tips for Success:
- Fresh Is Best: Always use fresh, quality produce for the best-tasting results.
- Follow Tested Recipes: Follow closely to the tested recipes from trusted sources for safe and successful canning.
- Inspect Lids and Seals: Prior to use, always check your lids and jars for any flaws that might prevent a proper seal. After cooling, double-check that each jar has successfully sealed.
- Store Properly: A cool, dark, and dry storage area helps preserve optimal quality and prolong shelf life.
Troubleshooting a Failed Seal:
- Refrigerate: Unsealed jars should be refrigerated and used promptly, within a few days.
- Reprocess (Optional): If you discover an unsealed jar within 24 hours of canning, you can attempt to reprocess it. Always use a new, unused lid. Reprocess for the full time specified in the original recipe.
Enjoy the Fruits (and Vegetables) of Your Labor:
Savor the taste of your hard work! Canning is a rewarding endeavor that allows you to enjoy summer’s bounty all year long. There’s a real sense of satisfaction that comes with opening a jar of homemade preserves that you created from fresh, wholesome ingredients.